
Soil testing is an essential practice for gardeners, farmers, and landscape professionals. It provides valuable insights into the nutrient content, pH levels, and overall health of the soil. There are different types of soil testing kits available, including DIY chemical-based kits, electronic soil testers, and laboratory soil testing services. By choosing the right soil testing kit for your needs, you can improve plant health, save money on unnecessary fertilizers, and practice environmental stewardship.
Key Takeaways:
- Soil testing is crucial for understanding the nutrient content and pH levels of the soil.
- Choosing the right soil testing kit is important for accurate results and targeted amendments.
- Regular soil testing helps improve plant health, save money, and promote environmental stewardship.
- Handheld probe-based soil testers are convenient tools for assessing soil conditions.
- Soil testing kits can be purchased online or at local gardening centers and home improvement stores.
Types of Soil Testing Kits
When it comes to soil testing, there are three main types of soil testing kits available: DIY chemical-based kits, electronic soil testers, and laboratory soil testing services. Each type has its own advantages and suits different needs. Let’s take a closer look at each of them:
DIY Chemical-based Kits
DIY chemical-based kits are a popular choice for home gardeners. These affordable and easy-to-use kits utilize chemical reactions to determine the pH and nutrient levels of the soil. They typically come with color-coded test strips or vials that change color based on the soil’s chemical properties. This method provides a quick and basic assessment of the soil’s health.
Electronic Soil Testers
For more accurate measurements, electronic soil testers are a great option. These devices can measure various parameters, including pH, nutrient levels, temperature, moisture, and even sunlight levels. Electronic soil testers often come with probes that need to be inserted into the soil to obtain readings. They provide digital results, making it easier to interpret and analyze the data.
Laboratory Soil Testing Services
For the most comprehensive analysis, laboratory soil testing services are the way to go. These professional services have advanced equipment and trained technicians who can provide detailed reports on the nutrient content, pH levels, organic matter, and other important factors affecting soil health. They often give recommendations for specific soil amendments based on the test results, ensuring optimal plant growth.
Choosing the right soil testing kit depends on your specific needs, budget, and desired level of accuracy. DIY chemical-based kits are suitable for basic pH and nutrient testing, electronic soil testers offer more measurements and accuracy, while laboratory soil testing services provide the most comprehensive analysis. Consider your requirements and make an informed decision to improve your gardening practices.
| Soil Testing Kit | Benefits |
|---|---|
| DIY Chemical-based Kits | – Affordable and easy to use – Quick assessment of pH and nutrient levels – Suitable for home gardeners |
| Electronic Soil Testers | – Accurate measurements of multiple parameters – Digital results for easier interpretation – Convenient for regular monitoring |
| Laboratory Soil Testing Services | – Comprehensive analysis of soil health – Detailed reports and recommendations – Professional expertise and equipment |
Benefits of Soil Testing
Soil testing offers a wide range of benefits for gardeners and anyone involved in plant cultivation. By understanding the nutrient content, pH levels, and overall health of the soil, you can make informed decisions about soil amendments and fertilizers. Here are some key advantages of soil testing:
1. Improved Plant Health
One of the main benefits of soil testing is that it helps improve plant health. By identifying nutrient deficiencies or imbalances in the soil, you can provide targeted amendments to ensure optimal growth and development. This means healthier plants, better yields, and more vibrant blooms.
2. Cost Savings
Regular soil testing can also help you save money. By understanding the specific nutrient needs of your soil, you can avoid over-application of fertilizers and other soil amendments. This not only reduces your expenses but also minimizes the risk of nutrient runoff and pollution, promoting environmental stewardship.
3. Tailored Solutions
Soil testing provides tailored solutions based on the specific composition of your soil. Laboratory soil testing services, in particular, offer comprehensive analysis and detailed reports on nutrient content, pH levels, organic matter, and recommendations for soil amendments. This helps you make precise adjustments to create the ideal growing conditions for your plants.
By utilizing soil testing as a regular practice, you can optimize your gardening efforts and achieve the best possible results. The information provided by soil testing allows you to fine-tune your approach and create an environment where your plants can thrive.
| Benefits of Soil Testing |
|---|
| Improved Plant Health |
| Cost Savings |
| Tailored Solutions |

“Soil testing is essential for any serious gardener. It provides valuable insights into the nutrient content and pH levels of the soil, allowing for targeted amendments. By understanding the specific needs of your soil, you can create the ideal growing conditions for your plants and achieve outstanding results.”
– Gardening Expert
How to Choose the Right Soil Testing Kit
Choosing the right soil testing kit is essential for accurate and reliable results. Consider the following factors to make an informed decision:
- Your specific needs: Determine what aspects of the soil you want to test. Are you interested in pH levels, nutrient content, moisture levels, or all of the above? Different soil testing kits offer varying capabilities, so choose one that aligns with your requirements.
- Level of analysis required: Consider the level of detail you need in the soil testing results. DIY chemical-based kits provide basic pH and nutrient testing, while electronic soil testers offer more comprehensive measurements, including temperature, moisture, and sunlight levels. Laboratory soil testing services provide the most detailed analysis.
- Budget: Evaluate your budget and determine how much you are willing to spend on a soil testing kit. DIY kits are generally more affordable, while electronic testers and laboratory services can be more expensive. Consider the long-term benefits of accurate soil testing when making your decision.
- Ease of use: Some soil testing kits require technical knowledge or expertise to operate, while others are designed for simplicity and ease of use. Consider your comfort level with technology and the amount of time and effort you are willing to invest in the testing process.
By carefully considering these factors, you can choose a soil testing kit that suits your needs, budget, and desired level of accuracy. Remember that soil testing is a valuable tool for improving plant health and optimizing gardening practices, so investing in the right kit is worth the effort.

Table: Comparison of Soil Testing Kits
| Soil Testing Kit | Features | Price Range | Level of Analysis |
|---|---|---|---|
| DIY Chemical-based Kits | Basic pH and nutrient testing | $10 – $50 | Low |
| Electronic Soil Testers | Accurate measurement of pH, nutrients, temperature, moisture, and sunlight levels | $50 – $150 | Medium |
| Laboratory Soil Testing Services | Comprehensive analysis of nutrient content, pH levels, organic matter, and recommendations for soil amendments | $100 – $300 | High |
Table: Comparison of soil testing kits based on features, price range, and level of analysis.
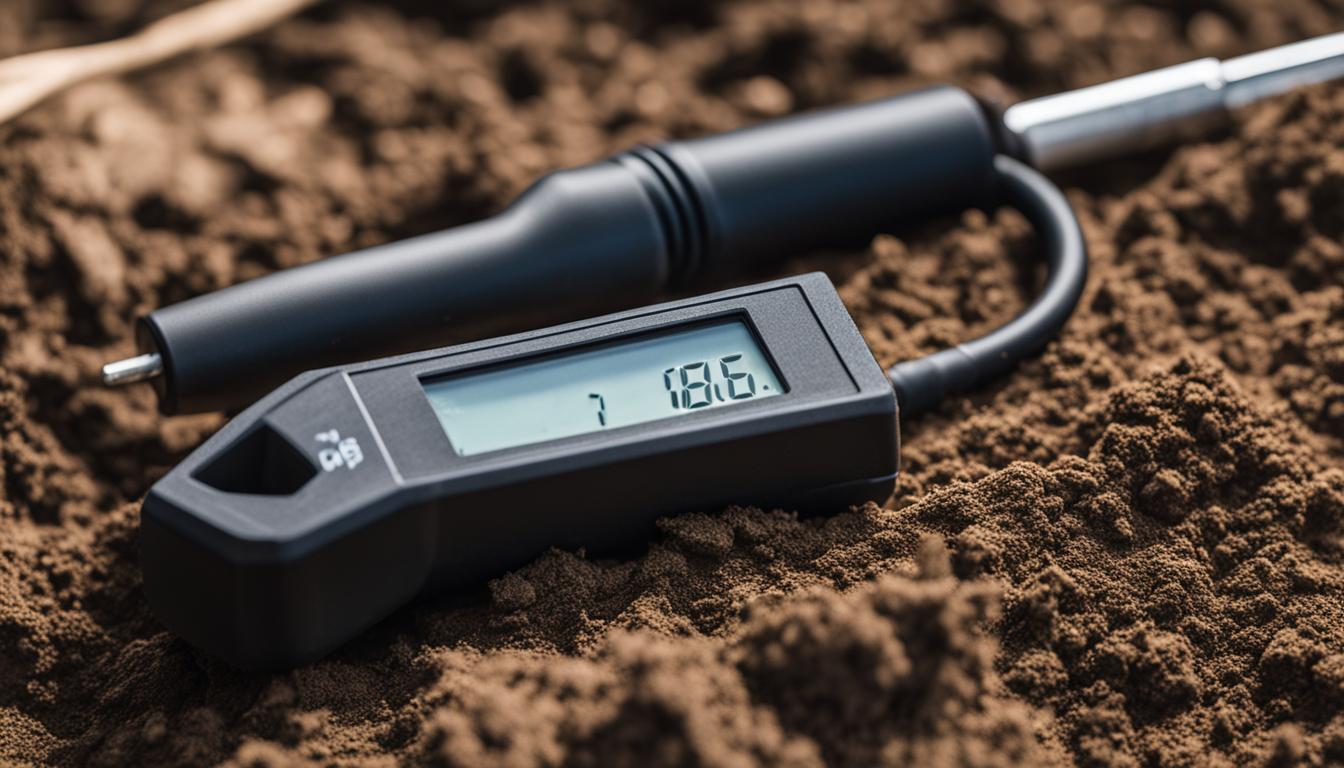
Using a Handheld Probe-Based Soil Tester: A Step-by-Step Guide
Handheld probe-based soil testers are a convenient tool for assessing various aspects of the soil, including pH, moisture, and sometimes nutrient levels. These testers are easy to use and provide instant readings, allowing you to quickly evaluate the health of your soil. If you’re new to using a handheld probe-based soil tester, here is a step-by-step guide to help you get started:
Step 1: Read the User Manual
Before using a handheld probe-based soil tester, it’s important to read the user manual provided by the manufacturer. The manual will provide specific instructions on how to properly use and care for your tester. Familiarize yourself with the different buttons and functions of the tester to ensure accurate readings.
Step 2: Prepare the Soil
Prior to testing, make sure the soil is prepared for accurate results. Ensure the soil is moist but not saturated, as excess water can affect the readings. Remove any debris or rocks that may interfere with the probe’s penetration. It’s also a good practice to test multiple locations in your garden to get a comprehensive understanding of the soil’s condition.
Step 3: Insert the Probe
Insert the probe into the soil according to the tester’s instructions. The depth at which the probe should be inserted may vary depending on the specific tester you are using. Allow the probe to settle in the soil for a few moments to ensure a stable reading. Take note of the reading displayed on the tester and record it for future reference.
Step 4: Clean and Store the Tester
After each use, it’s important to clean the probe-based soil tester to maintain its accuracy and longevity. Gently wipe the probe with a clean cloth or tissue to remove any soil residue. Avoid using water or any cleaning agents that may damage the tester. Store the tester in a cool, dry place until its next use.
Using a handheld probe-based soil tester is a simple and effective way to assess the health of your soil. By following this step-by-step guide, you can confidently use this tool to make informed decisions about your gardening practices and ensure the optimal growth of your plants.

Where to Buy Soil Testing Kits
Soil testing kits are widely available for purchase, both online and in physical stores. If you prefer online shopping, you can find a variety of options on platforms like Amazon. Some popular soil testing kits include the Luster Leaf 1601 Rapitest Test Kit, the Luster Leaf Products 1663 80 Professional Soil Test Kit, and the Suplong Soil pH Meter 3 in 1 Plant Soil Testing Kit. These kits are highly rated and offer reliable results for assessing soil health and nutrient levels.
For those who prefer to shop at local gardening centers or home improvement stores, you may also find a selection of soil testing kits. These stores often carry brands like Garden Tutor and XLUX, which offer soil pH test kits and soil pH testers, respectively. By visiting a physical store, you can ask questions and receive personalized assistance in selecting the right soil testing kit for your needs.
Here is a table summarizing the various soil testing kits available:
| Soil Testing Kit | Features |
|---|---|
| Luster Leaf 1601 Rapitest Test Kit | Tests pH levels, nitrogen, phosphorus, and potassium levels |
| Luster Leaf Products 1663 80 Professional Soil Test Kit | Tests pH levels, nitrogen, phosphorus, potassium, and more |
| Suplong Soil pH Meter 3 in 1 Plant Soil Testing Kit | Tests pH levels, moisture, and sunlight levels |
| Garden Tutor Soil pH Test Kit | Tests pH levels |
| XLUX Soil pH Tester | Tests pH levels |

Whether you choose to buy online or in-store, these soil testing kits offer reliable solutions for assessing the health and nutrient levels of your soil. By using the right soil testing kit, you can make informed decisions about soil amendments and improve the overall success of your gardening endeavors.
Why is Soil Testing Important?
Soil testing is a crucial practice for any gardener or landscaper. It provides valuable insights into the nutrient content, pH levels, and overall health of the soil. By understanding the composition of the soil, you can make informed decisions about the type and amount of fertilizers and soil amendments to use. This not only improves plant health but also saves you money by avoiding the over-application of unnecessary products.
Moreover, soil testing promotes environmental stewardship. By accurately assessing the nutrient levels in your soil, you can apply fertilizers more efficiently, minimizing the risk of nutrient runoff and water pollution. This helps protect our waterways and ecosystems. Soil testing also helps identify any contaminants, such as heavy metals, which may be present in your soil. This knowledge ensures a safe and healthy growing environment for your plants.
Regular soil testing is essential for maintaining the long-term health and productivity of your garden, lawn, or landscape. Soil conditions can change over time, and plant nutrient requirements may vary depending on the species you are growing. By regularly testing your soil, you can monitor its nutrient levels and pH and make any necessary adjustments to ensure optimal plant growth and vitality.

Benefits of Soil Testing:
- Identifies nutrient deficiencies or imbalances to improve plant health
- Reduces the use of unnecessary fertilizers, saving money
- Promotes environmental stewardship by using fertilizers efficiently
- Helps avoid the over-application of fertilizers and soil amendments
- Identifies soil contaminants for a safe growing environment
- Provides tailored solutions for optimal plant growth
Soil testing is a simple and cost-effective way to ensure the success of your garden or landscape. By understanding the unique needs of your soil, you can create a customized fertilization and amendment plan that will result in healthier, more vibrant plants. Incorporate soil testing as a regular practice and reap the benefits of a thriving outdoor space.
| Type of Soil Testing Kit | Key Features |
|---|---|
| DIY Chemical-based Kits | Affordable and easy to use |
| Electronic Soil Testers | Provide accurate measurements of pH, nutrient levels, temperature, moisture, and sunlight |
| Laboratory Soil Testing Services | Offer comprehensive analysis, detailed reports, and tailored recommendations |
When Should Soil Be Tested?
Soil testing is an important practice for maintaining healthy and productive gardens. But when is the best time to test your soil? Ideally, soil testing should be done in the fall after the growing season and before winter preparations. This timing allows you to use the test results in planning fall soil amendments and spring fertilizer programs. Testing during periods of active plant growth may yield less accurate results due to constant changes in soil pH and nutrient levels.
Regularly testing soil at the same time of year also helps track trends and make informed decisions. It allows you to monitor changes in nutrient levels and pH over time, ensuring that your soil remains in optimal condition for plant growth. By establishing a routine testing schedule, you can tailor your soil amendments and fertilizers based on the specific needs of your plants.
While fall testing is recommended, soil can be tested at any time of the year as long as the ground is not frozen. So if you missed the fall window, don’t worry – you can still test your soil during other seasons. Just keep in mind that the timing may affect the accuracy and interpretation of the results. Whether you’re a home gardener or a professional landscaper, regular soil testing is an essential tool for maintaining healthy and nutrient-rich soil.

Table: Best Time to Test Soil
| Soil Type | Recommended Testing Frequency |
|---|---|
| Sandy soils | Every 2-3 years |
| Clay soils | Every 3-4 years |
| Fertility-challenged soils | Annually for the first few years, then every 2-3 years |
How Often Should You Test the Soil?
Regular soil testing is essential for maintaining healthy and productive gardens. The frequency of soil testing depends on the results and the specific needs of the plants being grown. If the soil test results indicate optimal nutrient levels and pH, testing every year may not be necessary. Sandy soils can be tested every two to three years, while clay soils may be tested every three to four years. For low-fertility soils, testing annually for the first few years can help establish a fertilizer program. Once a good program is established, testing every couple of years should be sufficient for maintenance.
It’s important to note that the timing of soil testing is also crucial. Soil can be tested any time of the year, as long as the ground is not frozen. However, the best time for soil testing is in the fall after the growing season and before winter preparations. This timing allows for the use of test results in planning fall soil amendments and spring fertilizer programs. Testing during periods of active plant growth may yield less accurate results due to constant changes in soil pH and nutrient levels. Regularly testing soil at the same time of year helps track trends and make informed decisions.
Table: Recommended Soil Testing Frequencies
| Soil Type | Testing Frequency |
|---|---|
| Sandy soils | Every two to three years |
| Clay soils | Every three to four years |
| Low-fertility soils | Annually for the first few years, then every couple of years |
By testing the soil regularly and following the recommended frequencies, you can ensure that your plants receive the necessary nutrients for optimal growth. Soil testing empowers you to make informed decisions about fertilizers and soil amendments, leading to healthier and more productive gardens. So don’t overlook the importance of soil testing and make it a regular practice in your gardening routine!
Conclusion
In conclusion, incorporating advanced soil testing equipment into your gardening routine is essential for achieving better results. By understanding the nutrient content, pH levels, and overall health of your soil, you can make informed decisions about soil amendments and fertilizers, leading to healthier and more productive plants.
Choosing the right soil testing kit is crucial for accurate and reliable results. Consider your specific needs, budget, and desired level of accuracy when selecting a kit. Whether you opt for a DIY chemical-based kit, an electronic soil tester, or laboratory soil testing services, ensure it aligns with your gardening goals.
Regular soil testing should be a part of your ongoing gardening practices. By monitoring your soil’s condition over time, you can track trends, make informed decisions, and ensure the ongoing health and success of your plants. Whether you test annually or every few years, soil testing allows you to maintain optimal soil conditions and achieve the best possible gardening results.
FAQ
Why is soil testing important?
Soil testing is important because it provides valuable information about the soil’s nutrient content, pH levels, and overall health, allowing for targeted amendments to improve plant growth. It also helps avoid over-application of fertilizers, saves money, and reduces the risk of nutrient runoff and pollution. Regular soil testing is essential for maintaining healthy and productive gardens, lawns, and landscapes.
How often should soil be tested?
The frequency of soil testing depends on the results and the specific needs of the plants being grown. If the soil test results indicate optimal nutrient levels and pH, testing every year may not be necessary. Sandy soils can be tested every two to three years, while clay soils may be tested every three to four years. For low-fertility soils, testing annually for the first few years can help establish a fertilizer program. Once a good program is established, testing every couple of years should be sufficient for maintenance.
How to choose the right soil testing kit?
When choosing a soil testing kit, consider your specific needs and the level of analysis required. DIY chemical-based kits are affordable and easy to use, suitable for basic pH and nutrient testing. Electronic soil testers offer more accurate results and additional measurements, such as temperature, moisture, and sunlight levels. Laboratory soil testing services provide the most comprehensive analysis, but they require more effort and cost. Consider your budget, the level of accuracy needed, and the ease of use when selecting a soil testing kit.
How to use a handheld probe-based soil tester?
To use a handheld probe-based soil tester, start by reading the user manual provided by the manufacturer for specific instructions. Prepare the soil by ensuring it is moist but not saturated and free from debris. Insert the probe into the soil according to the tester’s instructions and wait for a reading. Record the results and test multiple locations for a comprehensive understanding of the soil’s condition. Clean and store the tester after use.
Where can I buy soil testing kits?
Soil testing kits are widely available for purchase. Online retailers like Amazon offer a variety of options, including the Luster Leaf 1601 Rapitest Test Kit, the Luster Leaf Products 1663 80 Professional Soil Test Kit, and the Suplong Soil pH Meter 3 in 1 Plant Soil Testing Kit. Other options include the Garden Tutor Soil pH Test Kit and the XLUX Soil pH Tester. Additionally, local gardening centers and home improvement stores may also carry soil testing kits.


