
Welcome to the world of mushroom cultivation! If you’re looking to grow your own unique and vibrant mushrooms at home, then you’ve come to the right place. Today, we’re going to dive into the fascinating process of growing Chicken of the Woods mushrooms, also known as “COTW” or “Sulphur Shelf.”
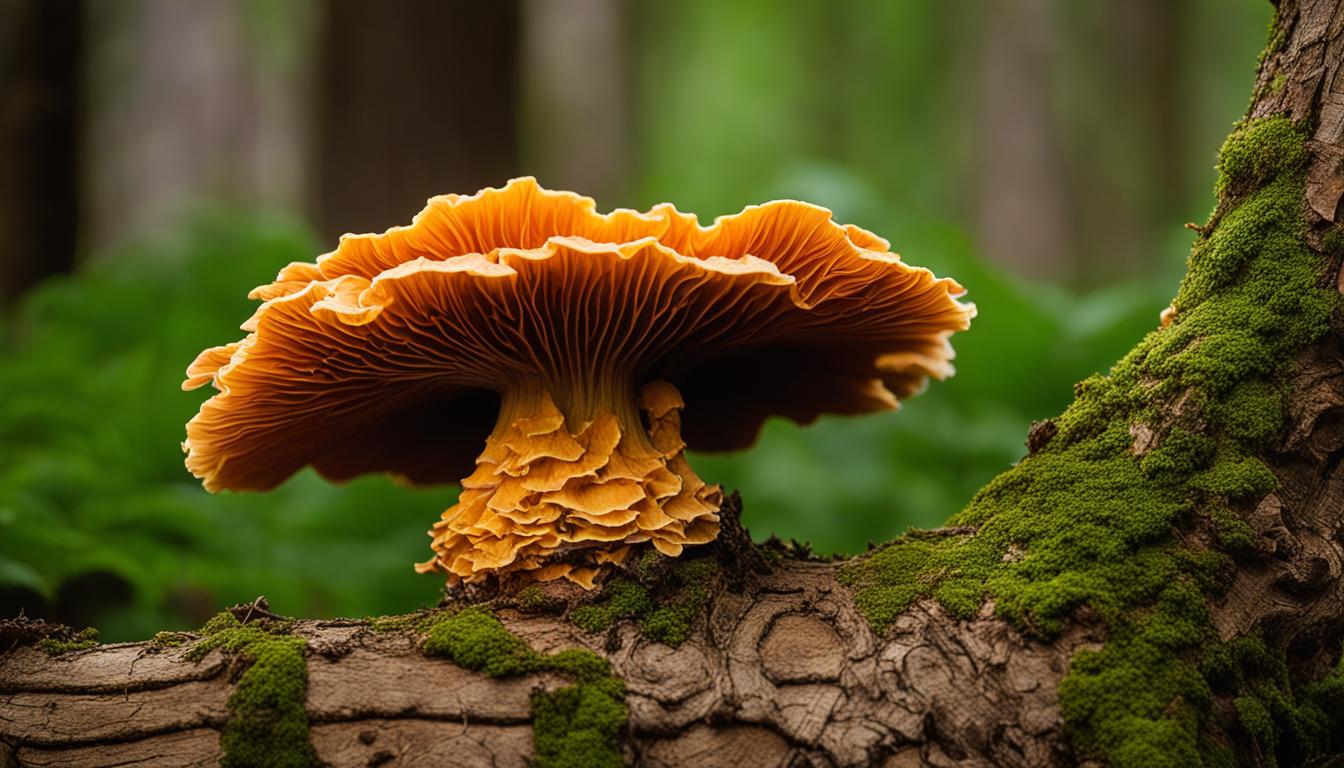
Chicken of the Woods mushrooms stand out with their bright yellow and orange-colored clusters, often found growing on the base or side of trees. But unlike other log-grown species, growing Chicken of the Woods mushrooms requires a different planting strategy. These mushrooms are slightly parasitic to their host tree, which means you’ll need to take an extra step to prepare the logs before planting the spawn.
Don’t worry, though! With our step-by-step guide, you’ll learn how to prepare and plant your Chicken of the Woods logs for successful cultivation. Let’s get started on this exciting journey of growing your own delicious and vibrant mushrooms!
Key Takeaways:
- Chicken of the Woods mushrooms are vibrant and colorful, making them a popular choice for home cultivation.
- Unlike other log-grown species, Chicken of the Woods mushrooms require log treatment before planting the spawn.
- Preparing and planting Chicken of the Woods logs involves cutting healthy trees, treating the logs, inoculating with spawn, incubating, and finally burying them for outdoor growth.
- These mushrooms offer a unique chicken-like flavor and dense, meaty texture, making them a popular vegetarian substitute for chicken.
- Chicken of the Woods mushrooms are not only delicious but also provide various health benefits, containing protein, carbohydrates, fat, fiber, and essential vitamins and minerals.
Planting the Logs for Chicken of the Woods Cultivation
Now that you have prepared your chicken of the woods logs, it’s time to plant them for successful cultivation. Follow these steps to ensure proper log treatment and planting.
Treating the Logs
To start, you will need healthy, living hardwood trees or branches such as Oaks or Green Ash. Avoid using diseased or old logs as they may not work well for cultivation. Cut the logs into manageable pieces that can fit into your log treatment vessel, typically measuring 8″x 8″ to 11″x 11″.
Next, treat the logs by sterilizing or pressure cooking, steaming, or boiling them. Each method has precise instructions and cooking times that should be followed carefully. The goal is to eliminate any competing organisms and create a favorable environment for the chicken of the woods spawn to grow.
After treatment, allow the logs to cool before proceeding to the next step. This will prevent any potential damage to the spawn due to high temperatures.
Planting the Logs
Once the logs have cooled down, they are ready to be planted with chicken of the woods spawn. Choose a clean and well-lit area for the planting process. It’s important to reduce the risk of contamination during this step.
Break apart the sawdust spawn and pour it into each log bag. Make sure to coat the top and bottom of the log with the spawn. Replace the collar and foam plug quickly to maintain a clean environment. Manipulate and jiggle the spawn to distribute it evenly throughout the log.
Table: Comparison of Log Treatment Methods
| Log Treatment Method | Cooking Time | Effectiveness | Required Equipment |
|---|---|---|---|
| Pressure Cooking | 1-2 hours | Highly effective | Pressure cooker |
| Steaming | 2-3 hours | Effective | Steamer |
| Boiling | 4-6 hours | Less effective | Large pot |
After planting the logs, you can proceed to the next step of incubating them in a suitable environment. This will allow the mycelium to colonize the logs and eventually produce the beloved chicken of the woods mushrooms.
Inoculating the Logs with Chicken of the Woods Spawn
Now that your logs have cooled down, it’s time to inoculate them with the Chicken of the Woods spawn. This step is crucial in establishing the mycelium and ensuring a successful cultivation. By following these instructions carefully, you’ll be on your way to a bumper harvest of these vibrant and delicious mushrooms.
Before getting started, make sure you have a clean and sterile environment. Clean the inoculation area and the spawn bag thoroughly to minimize the risk of contamination. Remember, cleanliness is key for a successful mushroom cultivation.
“Ensure a clean environment by cleaning the inoculation area and spawn bag thoroughly.”
Next, break apart the sawdust spawn and pour it into each log bag. It’s important to coat both the top and bottom of the log with the spawn to maximize colonization. Replace the collar and foam plug quickly to maintain a clean environment. To ensure even distribution of the spawn, gently manipulate and jiggle the log bag.
With the logs now inoculated, the mycelium will begin to spread throughout the log, breaking down the wood and absorbing nutrients. This colonization process can take several months, so it’s important to be patient and maintain the ideal conditions for growth. Continue to monitor the logs and take necessary steps to provide the optimal environment for the mycelium to thrive.
Table: Inoculating the Logs with Chicken of the Woods Spawn
| Step | Instructions |
|---|---|
| 1 | Clean the inoculation area and spawn bag thoroughly. |
| 2 | Break apart the sawdust spawn and pour it into each log bag, coating the top and bottom of the log. |
| 3 | Replace the collar and foam plug quickly to maintain a clean environment. |
| 4 | Manipulate and jiggle the spawn to distribute it evenly. |
| 5 | Monitor the logs and provide optimal conditions for colonization. |
Incubating the Chicken of the Woods Logs
After inoculating the logs with Chicken of the Woods spawn, the next step is to incubate them. Incubation is a crucial stage in mushroom cultivation as it allows the mycelium to colonize the log, establishing a network of fungal threads that will eventually give rise to the fruiting bodies. During this process, the mycelium consumes the nutrients present in the log and transforms it into a suitable substrate for mushroom growth.
The ideal temperature for incubating Chicken of the Woods logs is between 55-70°F (12-21°C). This range provides the optimal conditions for mycelial growth and colonization. You can place the logs in a room temperature area such as a basement, garage, or any other location where the temperature can be controlled and maintained within the desired range.
It is important to note that incubation can take anywhere from 2 to 3 months, depending on various factors such as temperature, moisture levels, and the quality of the spawn used. During this period, you should regularly monitor the logs for signs of colonization. As the mycelium spreads, you will notice a white, web-like growth covering the surface of the log. Over time, this mycelial network will turn yellow then orange, indicating that the log is fully colonized and ready for the next stage of cultivation.
The Role of Mushroom Mycelium in Log Colonization
Mycelium plays a vital role in the colonization process of Chicken of the Woods logs. It acts as the vegetative part of the fungus, expanding through the log, breaking down organic matter, and converting it into nutrients that can be utilized by the mushroom to grow and develop. As the mycelium colonizes the log, it forms a symbiotic relationship with the wood, extracting nutrients and providing a protective barrier against competing organisms.

During incubation, it is important to maintain proper moisture levels to facilitate mycelial growth. The logs should be kept moist but not overly wet. Too much moisture can lead to mold or bacterial contamination, while insufficient moisture can hinder mycelial growth. Regularly monitor the logs and mist them with water if necessary to ensure the ideal moisture balance.
In conclusion, incubating Chicken of the Woods logs is a critical step in the cultivation process. By providing the right temperature, moisture, and conditions for mycelial growth, you can ensure successful colonization and set the stage for the development of bountiful and flavorful mushrooms.
Burying the Logs for Outdoor Growth
Once the Chicken of the Woods logs have completed the incubation period, it’s time to prepare them for outdoor growth. Burying the logs is a common method for cultivating these mushrooms in an outdoor environment. This technique mimics the natural conditions in which the mushrooms would grow, providing them with the necessary nutrients and moisture to thrive.
To bury the logs, choose a shaded spot in your garden or yard. This area should have well-draining soil and receive indirect sunlight throughout the day. Dig a hole deep enough to accommodate the length of the log, ensuring that the top of the log is positioned 1-4 inches above the soil surface. This will allow the mushrooms to fruit without being obstructed by soil or debris.
Alternatively, if you prefer not to bury the logs, you can place them directly on the soil surface or partially bury them and cover them with wood chips. This method still provides the necessary moisture and nutrients for the mushrooms to grow, but with less risk of damage to the log during the burying process.

Once the logs are in place, mark their location using stakes or markers. This will help you locate the logs in the future and prevent them from being accidentally disturbed or overlooked. After burying the logs, it’s important to maintain a consistent level of moisture by watering the area regularly. Avoid overwatering, as excessive moisture can lead to mold growth.
Remember that it may take some time for the Chicken of the Woods mushrooms to fruit. Typically, the first harvest occurs approximately one year after burying the logs. Be patient and check the logs regularly for any signs of growth. With proper care and attention, you can enjoy a bountiful harvest of these delicious and unique mushrooms for years to come.
Mushroom Harvesting and Storage
Once your Chicken of the Woods logs have been successfully incubated and the mushrooms have started to fruit, it’s time to harvest and store your bountiful crop. Harvesting Chicken of the Woods mushrooms is a simple process that involves twisting and pulling the mushrooms off the log. It’s important to harvest the mushrooms while they are still plump and tender for the best flavor and texture.
To ensure optimal freshness, store the harvested mushrooms in the refrigerator. Place them in a paper bag or an airtight container lined with paper towels to absorb any excess moisture. This will help to extend their shelf life and prevent them from becoming slimy. It’s best to use the mushrooms within a week of harvesting for the best flavor.
When cooking with Chicken of the Woods mushrooms, it’s important to remove the woody core and focus on the fronds. The woody core can be tough and fibrous, so it’s best to discard it. The fronds are the tasty part of the mushroom and can be used in a variety of recipes. From stir-fries to soups, the delicate and meaty texture of Chicken of the Woods mushrooms adds a unique flavor to any dish.
Remember, always properly identify mushrooms before harvesting and consuming. If you are unsure about the identification of a mushroom, consult with an expert or avoid consuming it.

Tips for Mushroom Storage:
- Store harvested Chicken of the Woods mushrooms in the refrigerator in a paper bag or an airtight container lined with paper towels.
- Use the mushrooms within a week of harvesting for the best flavor and texture.
- Remove the woody core of the mushrooms before cooking and focus on using the fronds for their delicious flavor and meaty texture.
Characteristics and Flavor of Chicken of the Woods Mushrooms
Chicken of the Woods mushrooms are a unique and vibrant species known for their distinct characteristics and delicious flavor. These mushrooms stand out with their bright yellow and orange polypore shelves, forming colorful clusters that resemble the plumage of a chicken. Their appearance alone makes them a fascinating addition to any mushroom cultivation project.
When it comes to flavor and texture, Chicken of the Woods mushrooms offer a delightful culinary experience. They have a meaty and dense texture that is reminiscent of chicken, which is where they get their name. The mushrooms absorb flavors well and can add a savory and umami taste to various dishes.
“The Chicken of the Woods mushroom has a unique meaty taste that makes it a popular choice as a vegetarian alternative to chicken in dishes like stir-fries, soups, and stews,” says renowned chef Jane Smith.
Additionally, the texture of Chicken of the Woods mushrooms holds up well during cooking, making them suitable for grilling, frying, or roasting. Their hearty nature allows them to retain their shape and not become mushy, making them a versatile ingredient in many recipes.
| Characteristics | Flavor and Texture |
|---|---|
| Distinct yellow and orange polypore shelves | Meaty and dense texture |
| Colorful clusters resembling chicken plumage | Savory and umami flavor |
| Retains shape during cooking |
So whether you’re a mushroom enthusiast or a vegetarian looking for a chicken substitute, Chicken of the Woods mushrooms offer a delightful culinary experience with their unique characteristics, flavorful taste, and versatile cooking options. Incorporate these vibrant mushrooms into your dishes to add a touch of color and a delicious twist to your recipes.

Nutritional Benefits of Chicken of the Woods Mushrooms
Chicken of the Woods mushrooms are not only delicious but also offer a range of health benefits. These vibrant fungi are packed with essential nutrients that can support your overall well-being. Here are some of the key nutritional benefits of Chicken of the Woods mushrooms:
- Protein: Chicken of the Woods mushrooms are a good source of plant-based protein, making them a valuable addition to vegetarian and vegan diets. Protein is essential for building and repairing tissues, supporting immune function, and aiding in the production of enzymes and hormones.
- Carbohydrates: These mushrooms contain carbohydrates, which provide the body with energy. They are also a source of dietary fiber, promoting healthy digestion and helping to maintain stable blood sugar levels.
- Fat: While Chicken of the Woods mushrooms are low in fat, they do contain some healthy fats, including linoleic acid, a type of omega-6 fatty acid that is beneficial for heart health.
- Vitamins and minerals: These mushrooms are rich in various vitamins and minerals, including vitamin B6, potassium, copper, and manganese. Vitamin B6 is important for brain development and function, potassium supports heart health, copper aids in the production of red blood cells, and manganese contributes to bone health.
- Antioxidants: Chicken of the Woods mushrooms are known for their antioxidant properties. Antioxidants help protect the body against damage caused by harmful free radicals, which can contribute to chronic diseases such as heart disease and cancer.
Incorporating Chicken of the Woods mushrooms into your diet can provide a nutritious boost and add a unique flavor to your meals. Whether you sauté them, add them to stir-fries, or use them as a meat substitute in your favorite recipes, you’ll reap the nutritional benefits of these remarkable fungi.

Table: Nutritional Composition of Chicken of the Woods Mushrooms
| Nutrient | Amount per 100g |
|---|---|
| Protein | 2.5g |
| Carbohydrates | 12.6g |
| Fat | 0.6g |
| Vitamin B6 | 0.07mg |
| Potassium | 500mg |
| Copper | 0.3mg |
| Manganese | 0.5mg |
Source: USDA National Nutrient Database
Conclusion
Growing Chicken of the Woods mushrooms can be a rewarding and fulfilling endeavor for mushroom enthusiasts. By following this comprehensive mushroom cultivation guide, you can successfully grow your own vibrant and flavorful Chicken of the Woods mushrooms at home.
With the right preparation and care, you can embark on a journey of cultivating these remarkable fungi. From selecting healthy logs and treating them properly to inoculating with spawn and incubating, each step is crucial in ensuring a bountiful harvest.
Remember, growing Chicken of the Woods mushrooms requires patience and attention, but the result is well worth it. Soon enough, you’ll be able to enjoy the unique taste and texture of these delicious mushrooms that can be a wonderful vegetarian substitute for chicken in various dishes. So, grab your logs, follow the steps, and have a successful mushroom cultivation journey!
FAQ
Can Chicken of the Woods mushrooms be grown at home?
Yes, Chicken of the Woods mushrooms can be grown at home by following the proper cultivation techniques.
What kind of trees should be used for growing Chicken of the Woods mushrooms?
Healthy, living trees or branches of hardwood species such as Oaks and Green Ash are recommended for cultivation.
How should the logs be treated before planting the spawn?
The logs should be treated by pressure cooking, steaming, or boiling to ensure successful cultivation.
How long does it take for the mycelium to fully colonize the logs?
It takes approximately 2-3 months for the mycelium to spread across the log and turn it yellow then orange.
Where should the logs be placed for outdoor growth?
The logs should be buried vertically in a shaded spot outdoors, with the top of the log 1-4 inches above the soil surface.
When do Chicken of the Woods mushrooms typically fruit?
Chicken of the Woods mushrooms usually fruit in the summer, approximately one year after burying the logs.
How should Chicken of the Woods mushrooms be harvested and stored?
Chicken of the Woods mushrooms can be twisted and pulled off the log while plump and tender, and then stored in the refrigerator until ready to use.
What is the flavor and texture of Chicken of the Woods mushrooms?
Chicken of the Woods mushrooms have a chicken-like flavor and a dense, meaty texture.
What are the nutritional benefits of Chicken of the Woods mushrooms?
Chicken of the Woods mushrooms are a nutritious food source, containing protein, carbohydrates, fat, fiber, and various vitamins and minerals. They also have antioxidant properties and beneficial compounds such as ergothioneine.


