
Conducting soil pH testing at home is essential for successful gardening. The pH level of the soil affects plant growth and nutrient availability. By testing the soil pH, you can determine whether your plants are getting the right nutrients and make any necessary adjustments to improve soil health. In this article, we will guide you through the process of conducting soil pH testing at home, including why it’s important, how to take a soil sample, and how to interpret the results.
Key Takeaways:
- Soil pH testing is crucial for successful gardening.
- The pH level of the soil affects nutrient availability and plant growth.
- By conducting soil pH tests at home, you can make informed decisions about nutrient management.
- Taking a soil sample is the first step in the soil pH testing process.
- Interpreting the results of a soil pH test helps determine the need for soil amendments.
Why Get a Soil Test?
Soil testing is an essential step for any gardener or homeowner looking to create optimal growing conditions for their plants. Understanding the importance of soil tests and the benefits they provide is crucial for successful gardening.
One of the primary reasons to get a soil test is to assess the nutrient availability in your soil. The pH level of the soil directly affects how plants can absorb essential nutrients. By knowing the pH level, you can make informed decisions about fertilizers and soil amendments, ensuring that your plants receive the proper nutrients for healthy growth.
Another benefit of soil testing is the ability to determine the need for soil amendments. If the pH level is too high or too low, certain nutrients may become unavailable to plants. A soil test can help identify these imbalances and provide recommendations for adjusting pH levels and improving nutrient availability.
Soil testing is crucial for understanding your soil’s pH and nutrient levels, which are vital for plant growth and overall soil health. By conducting regular soil tests, you can fine-tune your gardening practices, optimize nutrient management, and create the ideal conditions for your plants to thrive.
Overall, soil testing provides valuable insights into your soil’s health and nutrient content. It empowers you to make informed decisions about fertilizers, amendments, and other gardening practices, leading to healthier plants, increased yields, and a more productive garden.
How to Take a Soil Test
Proper soil preparation and sample collection are essential steps when conducting a soil test at home. By following these guidelines, you can ensure accurate results and make informed decisions about your soil’s health.
Step 1: Prepare the Soil
Before taking a soil sample, remove any surface debris, rocks, or vegetation from the area you want to test. This will help ensure that your sample represents the true condition of the soil. Using a shovel or trowel, dig a V-shaped hole and take a 1-inch wide slice from the center of the hole. Repeat this process in different areas of your garden, collecting a total of 6-8 samples for mixing.
Step 2: Collect the Samples
Combine the samples in a clean container, breaking up any clumps and removing any stones or roots. Thoroughly mix the soil to ensure a representative sample. For accurate results, avoid collecting samples from areas that have been recently fertilized or amended.
Step 3: Dry and Package the Sample
Spread the mixed soil sample on a clean surface and let it air dry. Avoid using artificial heat sources, as they can alter the soil’s properties. Once the sample is dry, place it in a sealable plastic bag, clearly labeling it with your name, location, and the date of collection. This information is crucial for proper identification and analysis.
Step 4: Submit the Sample for Testing
Contact a reputable soil testing facility or your local county extension office for instructions on submitting your sample. They will provide you with any necessary forms and information on payment. Pack the sample securely and send it to the designated address or drop it off in person if applicable.
By following these simple steps, you can collect a representative soil sample and ensure accurate results from your soil test. Remember to consult the testing facility or extension office for specific instructions and any additional recommendations they may have based on your region’s soil conditions.
What Will a Soil Test Measure?
A comprehensive soil test evaluates various aspects of the soil, providing valuable information for gardeners and farmers. Here are the key measurements and evaluations included in a soil test:
1. Soil Texture Analysis
Soil texture refers to the relative proportions of sand, silt, and clay particles in the soil. It influences the soil’s ability to retain water, nutrient availability, and drainage. The texture analysis helps determine whether the soil is predominantly sandy, silty, or clay-based, providing insights into its physical properties. This information aids in selecting appropriate irrigation methods, soil amendments, and cultivation techniques.
2. pH Level Measurement
The pH level of the soil indicates its acidity or alkalinity. It plays a crucial role in nutrient availability and microbial activity. Most plants thrive in slightly acidic to neutral pH levels, typically around 6 to 7. Acidic soils (pH below 6) may require lime application to raise the pH, while alkaline soils (pH above 7) may need sulfur or other amendments to lower the pH. pH level measurement helps identify the need for pH adjustments and ensures plants can access nutrients efficiently.
3. Nutrient Evaluation
A soil test evaluates the availability of essential nutrients in the soil, including macronutrients (such as nitrogen, phosphorus, and potassium) and micronutrients (such as iron, zinc, and manganese). These nutrients are vital for plant growth and development. The test measures the nutrient levels in the soil, indicating whether they are sufficient or deficient. This information guides fertilization practices, allowing gardeners to provide the right nutrients in the right quantities, leading to healthy plants and optimal yields.
4. Soil Recommendations
Based on the results of the soil test, a comprehensive report is provided, suggesting specific soil amendments and fertilization strategies. These recommendations are tailored to address any deficiencies, imbalances, or pH issues identified in the soil. They may include instructions on adding organic matter, adjusting pH levels, and applying specific types and amounts of fertilizers. Following these recommendations can significantly improve soil fertility and create an ideal environment for plant growth.
By obtaining a soil test and examining these critical measurements, gardeners and farmers can make informed decisions regarding soil management, nutrient supplementation, and crop selection. Implementing the recommended changes can lead to healthier plants, increased yields, and improved overall soil health.

How Often Do You Do a Soil Test?
Regular soil testing is an essential practice for maintaining healthy soil and promoting successful gardening. But how often should you conduct a soil test? It is recommended to perform a soil test every 3 to 5 years to ensure that your soil’s pH level and nutrient content are optimal for plant growth. This timeframe allows you to track any changes in the soil over time and make necessary adjustments to improve soil health.
Performing a soil test in the fall is particularly advantageous as it gives you ample time to amend the soil before the next planting season. However, soil samples can be taken at any time of the year, depending on your gardening needs and preferences.
By conducting regular soil tests, you can monitor the nutrient levels in your soil and identify any deficiencies or imbalances that may affect plant growth. This proactive approach allows you to make informed decisions about fertilization and soil amendments, ensuring that your plants receive the necessary nutrients for optimal health and productivity.
Frequently Asked Questions
- What if my plants show signs of nutrient deficiencies between soil tests? – If your plants show signs of nutrient deficiencies, such as yellowing leaves or stunted growth, you can perform a soil test outside of the recommended interval. This will help you identify the specific nutrient deficiency and take appropriate corrective measures.
- Can I rely solely on visual cues to determine if my soil needs testing? – Visual cues, such as plant appearance and growth, can provide some indication of soil health. However, they are not always reliable indicators of nutrient imbalances or pH levels. A soil test provides accurate and scientific data, giving you a comprehensive understanding of your soil’s condition.
- Can I perform a soil test myself? – While professional soil testing through local extension offices is recommended for accurate results and detailed recommendations, there are also DIY soil test kits available for home use. These kits can provide a basic understanding of your soil’s pH levels and nutrient content, although they may not be as comprehensive as professional testing.
By following the recommended frequency of soil testing, you can ensure that your plants have the best possible growing conditions and maximize your gardening success.
| Frequency | Advantages |
|---|---|
| Every 3 years | Allows for tracking changes in nutrient levels over time |
| Every 5 years | Provides a baseline for soil health and nutrient content |

Where to Get a Soil Test
When it comes to getting your soil tested, you have two primary options: professional soil testing or home soil test kits.
Professional soil testing is often the preferred choice for its accuracy and detailed recommendations. Many local county extension offices offer soil testing services that are either free or available at a low cost. These facilities have specialized equipment and experienced professionals who can provide you with comprehensive insights into your soil’s pH level, nutrient content, and overall health. The information you receive from a professional soil test can help you make informed decisions about fertilizers, soil amendments, and other necessary adjustments for optimal plant growth.
If you prefer a more hands-on approach, home soil test kits are also available. These kits can be purchased at gardening centers or online. While they are convenient and easy to use, it’s important to note that home test kits may not provide the same level of accuracy or detailed recommendations as professional testing. They generally focus on measuring the soil’s pH level and may offer limited insights into other key factors. Home test kits can be a good option if you’re looking for a quick and affordable way to get a general idea of your soil’s pH, but for more precise results, professional testing is recommended.
| Soil Testing Option | Accuracy | Recommendations | Cost |
|---|---|---|---|
| Professional Soil Testing | High | Detailed | Free or low-cost |
| Home Soil Test Kits | Varies | Limited | Affordable |
Ultimately, the choice between professional soil testing and home test kits depends on your specific needs and budget. If you’re looking for accurate and comprehensive results, professional testing is the way to go. However, if you simply want a general idea of your soil’s pH level, a home test kit can provide a quick and affordable option. Regardless of the testing method you choose, regularly assessing your soil’s health through pH testing is essential for maintaining successful gardens and promoting optimal plant growth.

Remember, healthy soil leads to healthy plants, so don’t overlook the importance of soil testing in your gardening routine!
3 DIY Soil Tests
If you prefer to conduct DIY soil tests, there are three simple tests you can try at home. These tests provide a basic understanding of your soil’s pH, texture, and overall health. Let’s explore each test:
1. Soil Texture Test:
This test helps determine the composition of your soil, including the ratio of sand, silt, and clay. Take a small amount of soil and moisten it with water until it becomes a paste. Roll the paste into a ball and flatten it between your fingers. If it feels gritty, it has a sandy texture. If it feels smooth and holds its shape, it has a high clay content. And if it feels slightly gritty and crumbles easily, it has a silt texture.
2. Acidity Test:
The acidity of your soil, also known as pH level, can greatly affect plant growth. To test the pH, take two separate soil samples and place each in a small container. Add a few drops of vinegar to one container. If it fizzes or bubbles, your soil is alkaline. Then, add a pinch of baking soda to the other container. If it fizzes or bubbles, your soil is acidic. If neither sample reacts, your soil is neutral.
3. Soil Health Test:
The presence of earthworms is an indicator of soil health. Take a shovel and dig a small hole in your garden. Gently examine the soil, looking for earthworms. Their presence indicates a healthy soil ecosystem, as they help aerate the soil and break down organic matter.
Remember, these DIY tests provide a basic understanding of your soil’s properties. For a more comprehensive analysis, professional soil testing is recommended.

Testing Soil pH with Test Strips or Meters
When it comes to testing the pH of your soil, there are a couple of options that you can consider – test strips or pH meters. Both options have their advantages and can provide you with valuable information about the acidity or alkalinity of your soil. Let’s take a closer look at each method.
Soil pH Test Strips
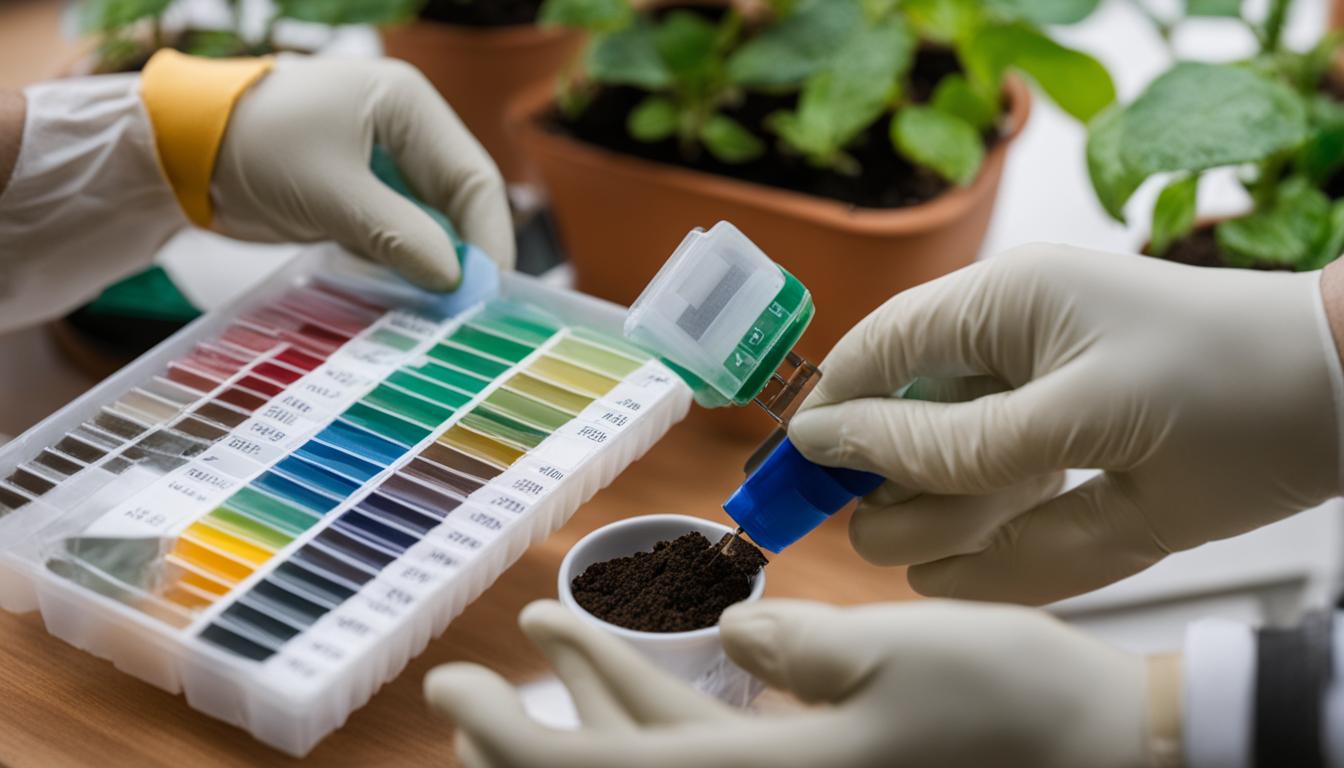
Soil pH test strips are a convenient and affordable option for testing the pH of your soil. These strips are coated with a special indicator dye that changes color based on the pH level of the soil. You simply need to insert the strip into a soil sample, wait for the color to develop, and then compare it to a color chart that comes with the strips. The color chart will help you identify the pH level of your soil.

One of the advantages of using soil pH test strips is that they provide immediate results. You don’t have to wait for a laboratory analysis or deal with any complex equipment. However, it’s important to note that the accuracy of test strips can vary, especially if the colors on the chart are not clearly defined. To ensure the best results, it’s recommended to use high-quality test strips from reputable brands.
pH Meters for Soil Testing
If you’re looking for a more precise measurement of your soil’s pH, a pH meter can be a great option. pH meters are electronic devices that measure the acidity or alkalinity of a solution, including soil. They provide a digital or analog reading, allowing you to get an accurate and specific pH value for your soil.
Some pH meters even come with additional features, such as measuring soil moisture and temperature. This can provide you with more comprehensive information about the overall health of your soil. However, it’s important to choose a reliable pH meter and calibrate it according to the manufacturer’s instructions to ensure accurate readings.
In conclusion, whether you decide to use soil pH test strips or a pH meter, both options can help you gain valuable insights into the pH level of your soil. Test strips offer convenience and immediate results, while pH meters provide more precise measurements. Whichever method you choose, regularly testing the pH of your soil will enable you to make informed decisions about nutrient management and adjustments for optimal plant growth.
Conclusion
Conducting soil pH testing at home is essential for maintaining soil health and ensuring successful gardening. By understanding the importance of soil pH testing, you can make informed decisions about nutrient management and amendments to promote optimal plant growth.
Regular soil testing allows you to provide the optimal conditions for your plants, ensuring they receive the right nutrients and enabling them to thrive. By incorporating soil pH testing into your gardening routine, you can monitor and adjust the pH levels of your soil, which is crucial for nutrient availability and absorption.
Remember, soil health is the foundation of successful gardening. By prioritizing soil pH testing, you can create an environment that supports healthy plant growth, prevents nutrient deficiencies, and maximizes your harvests. So whether you choose professional testing or opt for DIY methods, make soil pH testing a regular part of your gardening practice to achieve the best possible results.
FAQ
Why is conducting soil pH testing at home important?
Conducting soil pH testing at home is important because the pH level of the soil affects plant growth and nutrient availability. By testing the soil pH, you can determine whether your plants are getting the right nutrients and make any necessary adjustments to improve soil health.
How do I take a soil sample for testing?
To take a soil sample for testing, you need to remove any surface litter and debris from the soil. Next, use a shovel or trowel to dig a V-shaped hole and take a 1-inch wide slice from the center of the hole. Repeat this process in different areas of your garden, ensuring that the samples are mixed together in a clean container. Once you have collected the soil sample, dry it indoors, seal it in a plastic bag with your information, and send it to a soil testing facility for analysis.
What will a soil test measure?
A comprehensive soil test evaluates the soil’s texture, pH level, and nutrient content. It determines whether the soil is predominantly sandy, silty, or clay-based. The pH level indicates the acidity or alkalinity of the soil. The test also measures the availability of essential nutrients such as magnesium, calcium, phosphorus, and potassium. Based on the test results, the soil testing facility provides recommendations for improving nutrient levels and adjusting pH to ensure optimal plant growth.
How often should I conduct a soil test?
Soil testing should be conducted every 3 to 5 years to maintain optimal soil health. This timeframe allows for tracking changes in nutrient levels and pH over time. Fall is an ideal time for soil testing, as it provides ample time to make any necessary adjustments before the next planting season. However, soil samples can be taken at any time of the year.
Where can I get a soil test?
There are two primary options for soil testing: professional soil testing through local county extension offices and home soil test kits. Professional soil testing is more accurate and provides detailed recommendations, which are usually free or low-cost through county extension services. Home test kits are available at gardening centers, but they may not be as comprehensive or precise. Depending on your needs and budget, you can choose the option that suits you best.
Can I conduct DIY soil tests at home?
Yes, there are three simple DIY soil tests you can try at home. The first test is the soil texture test, which helps determine the soil’s composition of sand, silt, and clay. The second test is the acidity test, using vinegar and baking soda to gauge the soil’s pH level. The third test is the soil health test, which involves checking for earthworms in the soil. These DIY tests give a basic understanding of the soil’s texture, pH, and overall health.
How can I test soil pH with test strips or meters?
For a more precise measurement of soil pH, you can use test strips or pH meters. Test strips are affordable and provide immediate results by comparing the color change on the strip to a color chart. pH meters offer a digital or analog reading, and some even measure other factors like soil moisture and temperature. While pH meters can be more accurate, it’s important to research and choose a reliable product. Both options offer convenience and ease of use in testing soil pH.


