
Stuck inside this winter but still want to indulge your love for gardening? There are plenty of exciting indoor gardening projects you can tackle to keep your green thumb active. From creating a succulent fairy garden to starting an indoor herb garden, these projects will help you stay connected to nature and keep your gardening skills sharp.
Key Takeaways:
- Indoor gardening projects are a great way to keep your love for plants alive during the winter.
- Creating a succulent fairy garden or starting an indoor herb garden are fun and rewarding projects to try.
- Other projects like building a succulent wall garden, growing microgreens, and regrowing vegetables from scraps offer unique and eco-friendly gardening experiences.
- Learning to propagate plants and planning your spring garden are excellent ways to expand your gardening skills and prepare for the upcoming season.
- Winter gardening allows you to stay connected to nature and enjoy the therapeutic benefits of nurturing plants indoors.
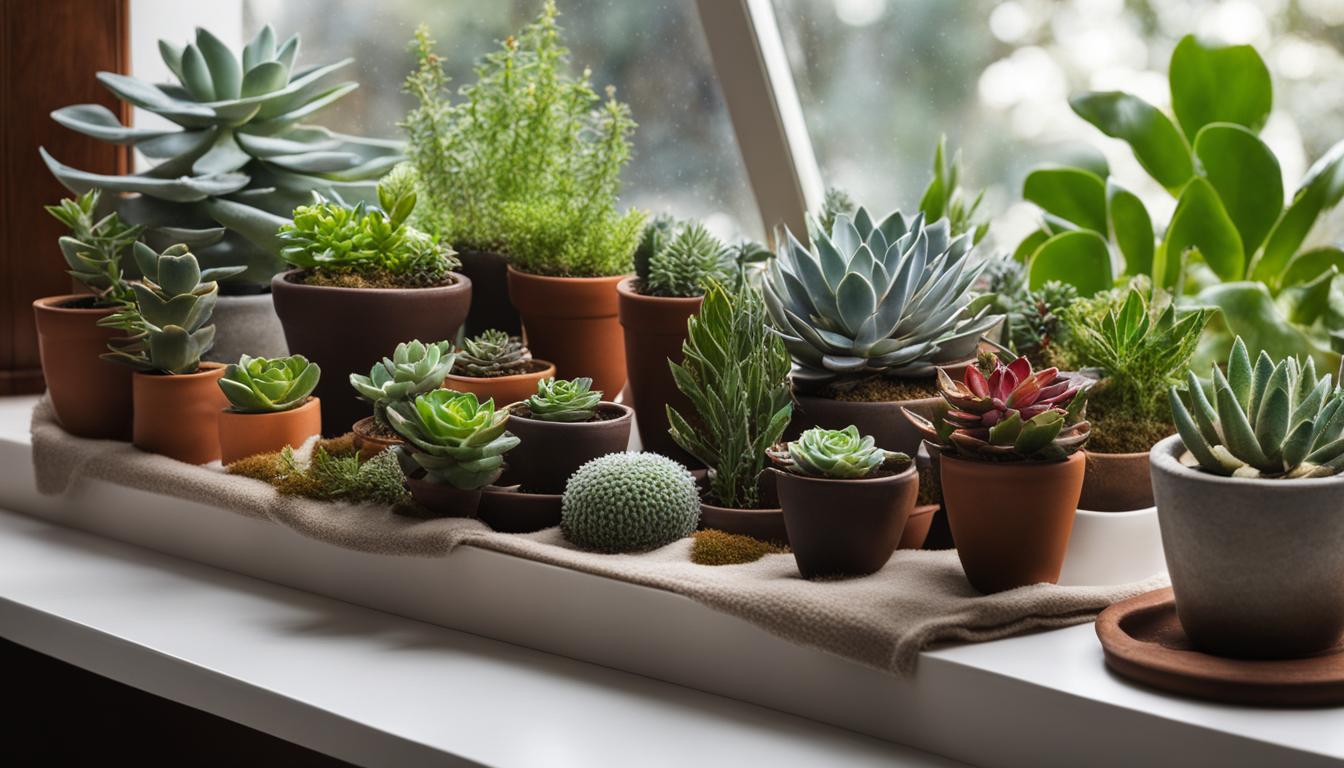
Create a Succulent Fairy Garden
Craft a mesmerizing succulent fairy garden using a variety of succulents, rocks, moss, and miniature accessories. Let your creativity run wild as you design a whimsical landscape with tiny cottages, benches, and fairytale critters. You can even repurpose broken planter pots as creative fairy garden containers. This project is perfect for unleashing your inner child or involving children in a fun gardening activity.
Transform a simple indoor terrarium into a magical world by arranging different types of succulents in a visually appealing and balanced way. Use rocks and moss to create pathways and add a touch of realism to your miniature garden. Enhance the enchantment with miniature fairy accessories like fairy houses, benches, and decorative fairies. The succulent fairy garden will not only provide a delightful indoor display but also offer a peaceful and calming escape from the winter blues.
“The succulent fairy garden will transport you to a whimsical world, where imagination and nature merge seamlessly. It’s a delightful project that can bring joy and a sense of wonder to both adults and children alike.”
Materials needed:
- Indoor terrarium or container
- Succulents of various shapes and sizes
- Rocks and pebbles
- Moss or preserved sheet moss
- Miniature fairy accessories (houses, benches, fairies)
- Soil suitable for succulents
- Gardening gloves
- Small gardening tools
Follow these steps to create your own succulent fairy garden:
- Select a suitable container or terrarium that allows for proper drainage.
- Prepare the container by adding a layer of rocks or pebbles at the bottom for drainage.
- Add a layer of soil specifically formulated for succulents.
- Arrange your succulents in the container, considering their size, shape, and color for a visually appealing composition.
- Plant the succulents, ensuring they are securely rooted in the soil.
- Add rocks, pebbles, and moss to create a naturalistic landscape.
- Place the miniature fairy accessories strategically throughout the garden, creating a sense of whimsy and magic.
- Water your succulent fairy garden sparingly, as succulents prefer dry conditions.
- Place your creation in a bright location, but protect it from direct sunlight, as succulents can get sunburned.
| Succulent Fairy Garden | Benefits |
|---|---|
| 1. Adds a touch of whimsy and magic to your indoor space | 1. Provides a creative and enjoyable indoor gardening project |
| 2. Brings nature indoors during the winter months | 2. Allows you to unleash your creativity and imagination |
| 3. Provides a peaceful and calming escape from the winter blues | 3. Involves children in a fun and educational gardening activity |
| 4. Offers a visually stunning and visually appealing centerpiece | 4. Requires minimal maintenance and care |
Let the beauty of a succulent fairy garden transport you to a world of enchantment and wonder. Get creative, have fun, and enjoy the soothing presence of nature, even during the coldest winter days.
Note: The image above showcases a visually appealing succulent fairy garden that can serve as inspiration for your own creation.
Start an Indoor Herb Garden
Indoor herb gardens are a fantastic way to bring fresh flavors and a touch of greenery into your home, even during the winter months. Whether you have a spacious kitchen windowsill or a small countertop, you can easily create a thriving herb garden right in your own space. Growing herbs indoors not only provides you with a convenient source of fresh ingredients for your culinary creations but also offers a therapeutic and rewarding gardening experience.
To start your indoor herb garden, choose a sunny spot in your home where your herbs can receive at least six hours of bright, indirect light each day. Herbs like parsley, cilantro, basil, and mint are excellent choices for indoor cultivation. Plant your herbs in well-draining pots or containers filled with a high-quality potting mix. Regularly water your herbs, allowing the soil to dry out slightly between waterings.
| Herb | Best Growing Conditions | Harvesting Time |
|---|---|---|
| Parsley | Full sun or bright, indirect light | 8-10 weeks after planting |
| Cilantro | Partial sun or bright, indirect light | 4-6 weeks after planting |
| Basil | Full sun or bright, indirect light | 6-8 weeks after planting |
| Mint | Partial sun or bright, indirect light | 6-8 weeks after planting |
Remember to pinch or trim your herbs regularly to promote bushier growth and prevent them from becoming leggy. With a little care and attention, your indoor herb garden will flourish, providing you with a continuous supply of flavorful herbs to enhance your favorite dishes throughout the winter season.

Essential Tips for Successful Indoor Herb Gardening
- Choose the right herbs: Select herbs that are well-suited for indoor growing conditions and ones that you frequently use in your cooking.
- Provide adequate light: Herbs need bright, indirect light to thrive. Place them near a south-facing window or supplement with artificial grow lights.
- Water appropriately: Avoid overwatering your herbs by allowing the soil to dry out slightly between waterings. Ensure proper drainage to prevent root rot.
- Pinch and trim regularly: Regularly pinch or trim your herbs to encourage bushier growth and prevent them from becoming leggy.
- Fertilize sparingly: Indoor herbs typically require less fertilizer than outdoor plants. Use a balanced, water-soluble fertilizer at half strength every 4-6 weeks.
Indoor herb gardens offer a convenient source of fresh ingredients all year round. Whether you’re a seasoned gardener or new to growing plants, starting an indoor herb garden is a fun and rewarding project that will elevate your culinary creations and bring a touch of nature into your home.
Build a Succulent Wall Garden
If you’re looking for a unique and visually stunning way to display your indoor plants, consider building a succulent wall garden. This vertical gardening project allows you to create a beautiful living wall that adds a touch of green to your home while also maximizing space. Succulent plants are perfect for this type of garden as they are low-maintenance and come in a variety of colors and textures.
To create your succulent wall garden, you’ll need a few supplies:
- A sturdy wall or vertical surface
- A frame or backing material
- Succulent plants of various sizes and types
- Specially designed succulent soil mix
- Pebbles or small rocks for drainage
- And, of course, your creativity!
Start by selecting the wall or surface where you want to install your succulent wall garden. Ensure that it receives enough sunlight or artificial light to support the succulents’ growth. Next, prepare the backing material by attaching a frame or affixing a wire mesh. This will provide support for the plants and allow for proper drainage.
Once your backing is ready, fill it with the succulent soil mix, making sure it is evenly distributed. Arrange your succulent plants on the surface, taking into consideration their size, shape, and color. Play around with different arrangements until you achieve the desired look. Finally, fill any gaps between the plants with pebbles or small rocks, ensuring proper drainage and a polished finish.
Benefits of a Succulent Wall Garden
A succulent wall garden offers several benefits beyond its aesthetic appeal. Firstly, the vertical display allows you to save space and take advantage of unused walls. Secondly, succulents are known for their water-retention capabilities, meaning they require less frequent watering than other indoor plants. This makes them ideal for a low-maintenance garden that thrives in any season.
Furthermore, succulents are resilient and adaptable, making them suitable even for those with limited gardening experience. They can tolerate a range of light conditions and temperature fluctuations, making them well-suited for indoor environments. Lastly, succulent wall gardens contribute to improved air quality by absorbing toxins and releasing oxygen, thereby creating a healthier living space.
Grow Microgreens
Looking for a nutritious and easy indoor gardening project? Why not try growing microgreens at home? Microgreens are young, tender plants that are harvested when they are just a few inches tall. They are packed with flavor, vitamins, and minerals, making them a healthy addition to your meals.
To get started, you’ll need a microgreen kit or shallow containers, potting soil, and your choice of microgreen seeds. Some popular options include broccoli, radish, kale, and sunflower. Fill your containers with moistened potting soil, sprinkle the seeds evenly over the soil surface, and lightly press them into the soil. Place the containers in a bright, sunny spot or under grow lights.
Water the seeds gently to keep the soil moist but not waterlogged. Within a few days, you’ll start to see tiny sprouts emerging. As the microgreens grow, continue to water them regularly and provide them with adequate light. In about 2 to 3 weeks, your microgreens will be ready to harvest. Simply snip them just above the soil line with a clean pair of scissors and enjoy them fresh in salads, sandwiches, or as a garnish.
| Benefits of Growing Microgreens at Home |
|---|
| 1. Nutrient-rich: Microgreens are loaded with essential vitamins and minerals, including vitamin C, vitamin K, and potassium. |
| 2. Quick and easy: Microgreens grow rapidly and require minimal space, making them an ideal choice for indoor gardening. |
| 3. Year-round supply: You can grow microgreens indoors all year round, regardless of the season. |
| 4. Cost-effective: Growing your own microgreens is more economical compared to buying them from the store. |
| 5. Flavorful addition: Microgreens add a burst of freshness and flavor to your dishes, elevating their taste and visual appeal. |
Indoor Gardening for Nutrition
Indoor gardening can be a fantastic way to enhance your nutrition during the winter months. By growing microgreens, you can enjoy a constant supply of fresh and nutrient-rich greens that are easy to incorporate into your meals. Whether you have limited outdoor space, live in a climate with harsh winters, or simply want to have a thriving garden indoors, microgreens are a perfect choice for indoor gardening.
Not only do microgreens provide an abundance of vitamins and minerals, but they also offer a wide range of flavors and textures. Experiment with different seed varieties to discover your favorites and create unique blends for your dishes. Growing microgreens is a fun and rewarding experience that allows you to take control of your food and add a healthy touch to your meals year-round.
Did you know? Research has shown that microgreens can contain up to 40 times more nutrients than their fully-grown counterparts!
So, why not give indoor gardening a try and start growing your own microgreens? With just a few simple supplies and a little bit of patience, you’ll be able to enjoy the freshest and most nutritious greens right from your indoor garden.
Image source: here
Start a Miniature Moss Garden
Discover the therapeutic benefits of creating a miniature moss garden. With just a few materials and indirect light, you can easily grow different varieties of moss and create a serene and calming display. This low-maintenance project is not only visually appealing but also a great way to bring a touch of nature into your home during the winter months.

Why Choose a Miniature Moss Garden?
A miniature moss garden is an excellent choice for indoor gardening with moss. Moss is a low-maintenance plant that thrives in shade and high humidity, making it perfect for indoor environments. It requires minimal watering and can be grown in small containers, allowing you to create a beautiful display even in limited space.
Getting Started with Your Miniature Moss Garden
To start your miniature moss garden, you’ll need a shallow container, such as a terrarium or a ceramic dish, that provides good drainage. Fill the container with a layer of potting soil or moss-growing medium, then carefully transfer small pieces of moss onto the soil surface. Gently press the moss down to ensure good contact with the soil.
- Choose different varieties of moss to create visual interest and texture in your garden.
- Keep your miniature moss garden in a location with indirect light to prevent the moss from drying out.
- Mist the moss occasionally to maintain humidity and prevent it from drying out.
- Avoid overwatering, as moss prefers moist rather than soggy conditions.
Enhancing Your Miniature Moss Garden
Take your miniature moss garden to the next level by adding decorative elements such as small figurines, rocks, or tiny fairy accessories. These additions can transform your moss garden into a whimsical and enchanting display. Just make sure to choose items that won’t harm the moss or interfere with its growth.
| Materials Needed | Instructions |
|---|---|
| Shallow container | Choose a container with good drainage to prevent waterlogging. |
| Potting soil or moss-growing medium | Provide a suitable growing medium for the moss to establish roots. |
| Moss | Select different varieties of moss for visual interest. |
| Decorative elements | Add small figurines, rocks, or fairy accessories to enhance the garden. |
With a little creativity and care, you can create a miniature moss garden that brings the beauty and tranquility of nature into your home. Immerse yourself in the calming presence of moss and enjoy the therapeutic benefits of indoor gardening during the winter months.
Germinate Seeds
If you’re eager to get a head start on your spring garden, germinating seeds indoors is a great winter gardening project. Starting your plants from seeds not only gives you more control over the growing process but also allows you to explore a wider variety of plant options. Here are some tips to help you successfully germinate seeds:
Choose the Right Seeds
When selecting seeds for germination, consider the climate and growing conditions in your area. Opt for varieties that are well-suited to your region and have a higher chance of success. Additionally, choose seeds that are fresh and from reputable sources to increase the likelihood of germination.
Create Ideal Conditions
Seeds need proper moisture and warmth to germinate successfully. Follow the instructions on the seed packets to determine the ideal temperature and moisture levels for each type of seed. You can create a mini greenhouse effect by covering your seed trays with plastic wrap or using a seed starter kit with a built-in cover.
Provide Adequate Light
Once the seeds have germinated and sprouted, it’s crucial to provide them with sufficient light. Place your seedlings in a sunny windowsill or use grow lights to ensure they receive at least 12-16 hours of light per day. This will promote healthy growth and prevent your seedlings from becoming weak and leggy.
| Seed Germination Tips | Benefits |
|---|---|
| Keep the soil moist, but not soaked | Prevents root rot and encourages germination |
| Label your seed trays | Helps you keep track of different plant varieties |
| Thin out seedlings | Allows the remaining plants to have enough space for healthy growth |
| Transplant seedlings carefully | Reduces the risk of damaging the delicate roots |
Transplanting Seedlings
Once your seedlings have developed a few sets of true leaves, they are ready to be transplanted into larger pots or the garden. Be gentle when handling the delicate roots and provide a well-draining soil mix to promote healthy growth. Gradually acclimate your seedlings to outdoor conditions by exposing them to sunlight and fluctuating temperatures before planting them in the garden.
By germinating seeds indoors, you can take a proactive approach to your gardening and ensure a bountiful harvest when spring arrives. Enjoy the satisfaction of nurturing your plants from the very beginning and watch as they flourish in your garden.

Regrow Veggies From Scraps

Reduce waste and embrace sustainable gardening by regrowing vegetables from kitchen scraps. Instead of throwing away the ends or leftovers of certain vegetables, you can give them a second life and enjoy the satisfaction of growing your own food. Not only is this a great way to save money, but it also promotes a sense of self-sufficiency and reduces your carbon footprint.
Regrowing vegetables from scraps is easier than you might think. Many common vegetables, such as lettuce, cabbage, basil, and onions, can be regrown with just a few simple steps. It’s a fun and educational project that you can do with your family, teaching children about the importance of sustainability and resourcefulness.
To get started, simply save the scraps from your vegetables instead of throwing them away. Place them in water or soil, depending on the vegetable, and watch as they sprout new roots and leaves. With a little care and patience, you’ll soon have fresh produce ready to harvest right in your own kitchen.
Did you know? You can regrow lettuce by placing the bottom of a lettuce head in a shallow dish of water. Within a few days, new leaves will start to appear. Once the plant has grown a substantial amount of new leaves, you can transplant it into soil and continue to harvest fresh lettuce.
By regrowing vegetables from scraps, you not only reduce waste but also gain a deeper appreciation for the food you eat. It’s a fulfilling way to connect with nature and make a positive impact on the environment. So before you toss those vegetable scraps into the trash, consider giving them a second chance at life through sustainable gardening.
Make Homemade Bird Feeders
Attracting birds to your garden can bring a lively and colorful atmosphere while also providing essential food sources for our feathered friends. Creating your own DIY bird feeders is not only a fun and creative project but also a great way to contribute to bird feeding projects. Here are some ideas to get you started in attracting a variety of bird species to your backyard.
Table: Comparison of DIY Bird Feeders
| Bird Feeder Type | Materials | Advantages |
|---|---|---|
| Milk Carton Feeder | Empty milk carton, sticks, strings, birdseed | – Easy to make – Provides shelter from rain – Attracts small and medium-sized birds |
| Plastic Bottle Feeder | Empty plastic bottle, dowel or wooden spoon, strings, birdseed | – Recycles plastic bottles – Allows for easy bird watching – Attracts a variety of bird species |
| Birdseed Wreath | Gelatin, birdseed, cookie cutters or wreath molds | – Decorative and visually appealing – Provides long-lasting food source – Attracts clinging bird species |
These homemade bird feeders not only provide nourishment for birds during the winter months but also add visual interest to your garden. Hang them in trees or near windows for optimal bird viewing. Remember to clean and refill the feeders regularly to prevent the spread of disease and ensure a steady supply of food for your feathered visitors. Enjoy the delightful sights and sounds of birds as they visit your garden and make it their temporary home.

Learn to Propagate Plants
Expand your gardening skills and save money by learning how to propagate plants. Whether you’re interested in propagating indoor houseplants or outdoor plants like basil, tomato, or pepper, this technique allows you to create new plants from cuttings. With different propagation methods at your disposal, you can grow an abundance of plants for your own garden or share them with others.
Plant propagation is a fascinating process that involves taking a cutting from a parent plant and encouraging it to develop roots and grow into a new plant. It’s a cost-effective way to expand your collection of plants without having to buy new ones. Plus, it’s a rewarding experience to see your plants flourish and thrive.
One common method of plant propagation is stem cutting. To propagate plants using stem cuttings, simply take a healthy stem from the parent plant, remove any lower leaves, and place it in a rooting medium such as water, perlite, or vermiculite. Keep the cutting in a warm and humid environment, and soon enough, you’ll notice roots forming. Once the roots have developed, you can transfer the cutting to a pot filled with potting soil and continue to care for it as you would any other plant.

Another method of plant propagation is leaf cutting, which is commonly used for succulent plants. To propagate plants through leaf cuttings, gently remove a healthy leaf from the parent plant and allow it to dry for a few days until the cut end forms a callus. Then, place the leaf on top of well-draining soil and lightly mist it to provide moisture. After a few weeks, new plantlets will begin to emerge from the base of the leaf, and you can eventually separate them and plant them individually.
Benefits of Plant Propagation:
- Cost-effective way to expand your plant collection
- Allows you to grow plants with specific characteristics
- Enables you to share plants with friends and family
- Provides a deeper understanding of plant growth and development
Whether you’re a seasoned gardener or just starting out, learning how to propagate plants is a valuable skill that can enhance your gardening experience. Experiment with different propagation methods and discover the joy of nurturing new life from cuttings. By propagating plants, you’ll not only save money but also create a more sustainable and self-sufficient garden.
| Propagation Method | Propagation Materials |
|---|---|
| Stem Cutting | Healthy plant stems, rooting medium (water, perlite, vermiculite), pots, potting soil |
| Leaf Cutting | Healthy plant leaves, well-draining soil, misting bottle, pots, potting soil |
| Air Layering | Sharp knife, rooting hormone, sphagnum moss, plastic wrap, twist ties |
Plan Your Spring Garden
As winter unfolds, it’s the perfect time to start planning your spring garden. Take advantage of this downtime to reflect on your gardening successes from the previous year and consider any areas for improvement. Whether you’re a seasoned gardener or just starting out, strategic planning will ensure a fruitful and enjoyable gardening season ahead.
Reflect on Past Successes and Challenges
Begin by reflecting on your past gardening successes and challenges. Consider which plants thrived in your garden and brought you joy, as well as those that didn’t perform as well as you had hoped. Take note of any pests or diseases that affected your plants and think about ways to prevent or manage them in the future. By learning from your experiences, you can make informed decisions for the upcoming season.
Explore New Plant Varieties
Spring is a time of renewal and growth, and what better way to embrace it than by exploring new plant varieties? Research different types of flowers, vegetables, and herbs that pique your interest. Look for plants that are well-suited to your climate and growing conditions, and consider their visual appeal and potential benefits to your garden ecosystem.
When selecting new plant varieties, also think about incorporating native plants that support local wildlife and promote biodiversity. Native plants are adapted to your region’s specific climate and provide important food and habitat for pollinators and other beneficial insects.
Experiment with Garden Design
Spring is the perfect time to experiment with garden design and layout. Consider the overall aesthetic you want to achieve, whether it’s a formal garden, a cottage-style border, or a lush and colorful wildflower meadow. Explore different garden themes and color schemes to create a cohesive and visually stunning outdoor space.
Think about different architectural elements you can incorporate, such as trellises, arbors, and stepping stones. These can add structure and interest to your garden while also serving practical functions. Make a rough sketch or use a garden design software to visualize your ideas and ensure they align with your space and budget.
Consider Crop Rotation and Companion Planting
Crop rotation and companion planting are valuable techniques to maximize your garden’s productivity and prevent pests and diseases. Plan your spring garden with crop rotation in mind, ensuring that you rotate plants from different families throughout your beds or containers. This helps to replenish soil nutrients and reduce the risk of soil-borne diseases or pests.
Additionally, consider companion planting, where certain plants are grown together to benefit each other. For example, planting marigolds alongside tomatoes can help deter pests, while growing herbs like basil near vegetables can enhance their flavor and repel pests. Research different companion plant combinations that work well together and incorporate them into your garden plan.
| Spring Garden Checklist | Notes |
|---|---|
| Reflect on past successes and challenges | Take note of plants that thrived and any issues you encountered |
| Research new plant varieties | Look for plants that suit your climate and garden goals |
| Experiment with garden design | Consider different themes, colors, and architectural elements |
| Plan for crop rotation and companion planting | Maximize productivity and pest prevention in your garden |
| Prepare your garden beds | Clear debris, amend soil, and make any necessary repairs |
| Order seeds and plants | Ensure you have everything you need for a successful start |
| Map out planting schedule | Consider frost dates and the growth habits of your chosen plants |
With careful planning and consideration, your spring garden is sure to flourish. Make the most of this winter season by immersing yourself in beautifully illustrated catalogs, researching new plant varieties, and envisioning the garden of your dreams. Soon, it will be time to roll up your sleeves, dig in the soil, and watch your garden come to life.
Conclusion
Wrap-up, summary, final thoughts
Winter doesn’t have to be a dull time for gardening enthusiasts. With these indoor gardening projects, you can keep your love for plants alive and have a thriving garden right in your own home. From creating miniature worlds with succulent fairy gardens to nurturing herbs, microgreens, and propagating plants, there’s no shortage of exciting projects to tackle.
Not only do these projects provide a creative outlet during the colder months, but they also offer numerous benefits. Indoor gardening helps you stay connected to nature, improve your gardening skills, and enjoy the therapeutic effects of nurturing plants. Plus, you’ll have fresh herbs, nutritious microgreens, and vibrant succulents to enhance your meals and home decor.
So, don’t let the winter blues dampen your gardening spirit. Embrace these indoor gardening projects and let your green thumb flourish. Before you know it, spring will arrive, and you’ll be well-prepared with a rejuvenated love for gardening and a whole new set of skills and experiences under your belt.
FAQ
Can I create a succulent fairy garden with children?
Yes, creating a succulent fairy garden is a fun activity that can be enjoyed with children. Let your creativity run wild and involve them in designing a whimsical landscape with miniature accessories.
How can I start an indoor herb garden?
Choose a bright and sunny spot in your home, like a kitchen windowsill, and grow herbs such as parsley, cilantro, and basil. Not only will you have fresh herbs for cooking, but you’ll also enjoy the therapeutic benefits of nurturing plants indoors.
What supplies do I need to build a succulent wall garden?
Building a succulent wall garden requires special supplies, but the end result is worth it. You’ll need materials like a wall frame, succulent plants, soil, and proper care to create a stunning vertical garden.
How can I grow microgreens at home?
You can grow microgreens at home with a microgreen kit and proper watering. Harvest your own nutrient-rich microgreens in just a few weeks and enjoy their flavor and nutrition in salads, sandwiches, and smoothies.
What materials do I need to create a miniature moss garden?
Creating a miniature moss garden is easy with just a few materials and indirect light. You’ll need moss, soil, a container, and a little care to create a serene and calming display.
What is the process for germinating seeds indoors?
Whether you need to purchase seed trays and potting mix or want to start plants from seeds, germinating seeds indoors is a fun and rewarding project. Watch as your seeds sprout and grow, and actively involve yourself in the entire gardening process.
How can I regrow vegetables from kitchen scraps?
Reduce waste and explore the wonders of regrowing vegetables by repurposing kitchen scraps. Lettuce, cabbage, basil, and onions are just a few examples of vegetables that can be regrown using simple techniques.
Can I make my own bird feeders?
Absolutely! Repurpose household items like milk cartons or plastic bottles to create unique and eco-friendly bird feeders. You can also try making a birdseed wreath for a more ornate display.
How do I propagate plants?
Plant propagation allows you to create new plants from cuttings. Whether you’re interested in propagating indoor houseplants or outdoor plants, learning different propagation methods will help you grow an abundance of plants for yourself or to share with others.
What can I do during the winter to plan my spring garden?
Use the winter downtime to plan your spring garden. Reflect on what worked well in the previous year, explore new plant varieties, and experiment with different gardening techniques. Consider factors like crop rotation, companion planting, and any specific research needed for the upcoming growing season.


